30 Apr 2025
A common pattern in endpoint configuration management is to audit a system for a desired state, and if a system deviates from this state, trigger remediation to bring it back into compliance.
This is how we handle almost all of our endpoint configuration management, powered through use of Jamf’s Extension Attributes, Smart Groups, and Policies. The moving parts look something like this:
- Update Inventory job runs recurringly on computers, triggering Extension Attribute evaluation.
- An Extension Attribute script runs on the computer to evaluate for desired state, and returns a Pass / Fail value to Jamf.
- Computers with a Fail value in that Extension Attribute are automatically added to a corresponding Smart Group.
- A Policy is scoped to the Smart Group, which attempts to remediate the problem, and then executes the “Update Inventory” payload.
While this works well enough, the mean time-to-detect and time-to-remediate tends to be pretty delayed, since both the execution of the Extension Attribute script and Policy will not trigger until an “Update Inventory” job is run, which we currently only run once a day, save for manual jamf recon invocations. Further compounding the delay, Smart Group membership updates may happen after an Update Inventory job, meaning remediation policies often require an additional inventory cycle before they execute.
In practice, it can end up taking up to two days before a given deviation is detected and remediated.
Doing things with Fleet
We’ve been using Fleet, and have begun evaluating their Premium offering. One of the features in Premium is the ability to run automations upon the detection of a failing policy. Of particular interest to us, is the ability for it to run a script automatically. Much like how Jamf’s policy works, we can use this to remediate deviations.
The cool thing about this is that unlike Jamf, which requires you to orchestrate Jamf to trigger the remediation as described above, Fleet automatically executes the policy automation basically immediately. Assuming the computer is online, this means that detection to remediation is roughly 30 minutes, the default check in cadence for the Fleet agent.
However, while the remediation may actually be applied within those 30 minutes, the policy will continue to show as unhealthy until the next time the Fleet agent checks in. Unfortunately, there is currently no built-in way to make Fleet check for policy state upon a policy automation being triggered.
Fortunately, there is a workaround!
While Fleet offers no built-in way to trigger a check in after a policy automation, we can do this programmatically, by appending check in logic at the end of every script triggered by a policy automation. But there is no command-line equivalent to jamf recon.
Instead, we can easily accomplish this via Fleet’s API, which provides a refetch device’s host route.
This request is authenticated using a device’s token, which means most of our concerns around how we’ll handle authentication are addressed. However, the device’s token is only made available on the device if the agent was installed with fleet-desktop, so if your fleet agent was not installed with this, you’ll need to rebuild your installer and reinstall.
Once the device token is available (by default, it should exist at /opt/orbit/identifier), you should be able to simply make a POST request to the endpoint using curl at the end of any given script.
DEVICE_TOKEN=$(cat /opt/orbit/identifier)
FLEET_URL='https://your-fleet-url.com'
curl -X POST "${FLEET_URL}/api/latest/fleet/device/${DEVICE_TOKEN}/refetch" \
  -H "Content-Type: application/json"

exit 0
This way, the Fleet agent will automatically check in after a policy automation runs. 🎉
It would be great if Fleet did this natively! To that end, I submit a feature request here.
Considerations
Fleet Desktop Dependency:
Unfortunately, this depends on Fleet Desktop being installed on the computer, which ensures the device token is populated. Without this, you’d need to generate an API token and expose it on the endpoint. I don’t really recommend this.
Potential for multiple refetch calls:
If you did use this pattern across all your policies, and you had a lot of policies that fail at once, it’s possible you could end up triggering the refetch job a lot. I don’t know if this’ll have any negative repercussions, but if Fleet were to implement this capability natively, I’d recommend they call a single refetch only after all policy automation jobs are completed.
Increasing Jamf Inventory Update frequency as an alternative:
You could! Unfortunately, Jamf’s Update Inventory job is triggered via a Policy, and Policy scheduling is not very granular. Outside of setting this to “Ongoing”, where it’ll run every time it checks in, the shortest recurring interval is “Once every day”.
You could shorten the interval by orchestrating the Update Inventory job outside of Jamf; for example, using a custom event trigger or running jamf recon via cron. But personally, I don’t think the added complexity is worth it.
25 Apr 2025
We use Jamf Pro as our MDM, and our main means of configuration management for our macOS endpoints. Most of the time, this works very well, but occasionally we’ve observed failures between the jamf agent installed on the endpoint, and the Jamf server, resulting in the agent failing to check in for prolonged periods of time. This has significant knock-on effects: if the jamf agent isn’t working on a system, other things start to fall apart.
One of the challenges in fixing this was that we were wholly dependent on Jamf for measuring and managing the states of our endpoints. To monitor Santa, our EDR, our zero-trust VPN, or any of the other various things we’d monitor on a system, Jamf is enough! But Jamf can’t monitor itself; if the jamf agent is broken on a system, it can’t report anything back.
This was one of the biggest reasons we wanted to deploy Fleet in our environment: Fleet would give us the ability to automatically identify and (potentially) remediate broken jamf agents.
Fleet has a vast number of osquery tables at its disposal, but unfortunately, none of them are directly relevant to understanding the state of the jamf agent and specifically, whether or not the jamf agent has recently checked in. Fleet does come with some capabilities to read certain filetypes or content from disk (e.g. plist, json, etc.), but as far as I know, there’s nothing on the filesystem that will give us the information we need in a way Fleet will natively understand. However, there is something of use on the filesystem we’ll be able to use!
Parsing the /var/log/jamf.log
By default, the jamf agent writes its logs to the /var/log/jamf.log. To figure out what log entries were most common, I put a quick script together to parse and sort them:
#!/bin/bash

# Usage: ./script.sh logfile.log

if [ -z "$1" ]; then
    echo "Usage: $0 [logfile]"
    exit 1
fi

sed -E 's/^.*jamf\[[0-9]+\]: //' "$1" | sort | uniq -c | sort -nr
This returns output like this:
6407 Checking for policies triggered by "recurring check-in" for user "sbenson"...
6358 Checking for patches...
6352 No patch policies were found.
 556 Removing existing launchd task /Library/LaunchDaemons/com.jamfsoftware.task.bgrecon.plist...
 184 Executing Policy Update Jamf Inventory
 184 Executing Policy Assign User Information to Device
 [etc.]
This gives us a great sense of what would be a reliable indicator for a healthy jamf agent. In particular, looking for lines containing No patch policies were found or Executing Policy will be great for our purposes, because it suggests the agent is communicating with the server, and they are frequently represented in our log. This means that if we have logs where these lines don’t show up, it’s a good indicator the jamf agent isn’t working.
However, in its current form, Fleet won’t be able to parse this log file. To work around that, we can leverage a Jamf extension attribute to deploy a script that periodically runs on the endpoint, to parse the log, identify the latest timestamp associated with a log entry that corresponds with successful communication between the jamf agent and Jamf server, and then write that timestamp to disk in a format Fleet will be able to use.
The following script should suffice:
#!/bin/bash
# Jamf EA: last_successful_checkin
#
#  Returns one of:
#    • 2025-04-25T09:21:38Z  (success stamp)
#    • no_success
#    • no_log
#
#  On success: writes JSON file for Fleet.
#  On failure: leaves the prior JSON untouched.

# config
LOGS=(/private/var/log/jamf.log*) # includes rotated logs
DIR="/opt/telemetry/jamf"
FILE="${DIR}/last_checkin"
SUCCESS='Executing Policy|No patch policies were found|No policies were found|Submitting log to' # Log items indicating success

if [[ ! -d "$DIR" ]]; then
  /usr/bin/install -d -o root -g wheel -m 700 "$DIR"
fi

shopt -s nullglob # glob silently to an empty list if no match
if (( ${#LOGS[@]} == 0 )); then
  echo "<result>no_log</result>"
  exit 0
fi

# locate most‑recent successful line
ts_line=$(grep -aE "$SUCCESS" "${LOGS[@]}" | tail -1)

if [[ -z "$ts_line" ]]; then
  echo "<result>no_success</result>"
  exit 0
fi

# convert timestamp
ts=$(awk '{print $2" "$3" "$4}' <<<"$ts_line") # e.g. Apr 25 09:21:38
epoch=$(date -j -f "%b %d %T" "$ts" "+%s") || exit 0
iso=$(date -u -r "$epoch" "+%Y-%m-%dT%H:%M:%SZ")

# write JSON for Fleet
printf '{"last_successful_checkin":"%s"}\n' "$iso" > "$FILE"
chown root:wheel "$FILE"
chmod 600 "$FILE"

# return ISO stamp to Jamf
echo "<result>$iso</result>"
This should result in a file at /opt/telemetry/jamf/last_checkin with the latest timestamp stored in json.
Extension attributes are generally used to capture data from the device in Jamf Pro, but in this case we don’t really need to do that. Jamf already does capture a device’s last check-in time anyway. Instead, I opt to capture whether or not the script ran into errors, for easier troubleshooting in the future.
Using Fleet to Monitor
Now that the data we need is available and in a format Fleet can work with, using it is pretty simple. Here’s a sample query and policy:
Query:
SELECT *
FROM parse_json
WHERE
    path = '/opt/telemetry/jamf/last_checkin' AND
    key = 'last_successful_checkin'
Policy (Pass if last checkin is less than 14 days ago):
SELECT 1
FROM parse_json
WHERE
    path = '/opt/telemetry/jamf/last_checkin' AND
    key = 'last_successful_checkin' AND
    datetime(value) > datetime('now', '-14 days')
In our case, we leverage something like this as a component in a much larger query & policy, which also looks at other data points relevant to the health of Jamf on our endpoints (e.g. presence of relevant .Apps, Configuration Profiles, LaunchDaemons, etc.)
Once we detect a broken jamf agent, we need to actually fix it. To do this, we’ve been leveraging a self-heal script I made, inspired by a post I read by a Dr. K at modtitan.com. The TL;DR is the script makes a request to the Jamf API to use MDM to redeploy the Jamf management framework on the computer specified.
We run this script manually, as running it automatically would mean exposure of our API credentials on our endpoints, which we want to avoid.
Other Considerations
Isn’t last check-in already present in Jamf Pro’s web UI?
It is! But the issue is that Jamf has no way of knowing if the computer is actually on or not.
So, sometimes a jamf agent that hasn’t checked in for 20 days means the agent is broken, while other times, it means the owner has been on vacation.
The above approach works because if Jamf log doesn’t show recent check in, but Fleet is able to communicate with the device, then it means the device is online, and something is wrong with the jamf agent.
What about false positives?
Our strategy with Fleet is to really dial in our policies, such that we can alert on them when they fail and action needs to be taken. To that end, minimizing false positives is vital.
In its current state, we may run into a race condition, where if a computer that has been powered off for a long period of time is powered on, and Fleet evaluates its policy before the jamf agent has had the chance to check in, the device will fail our Fleet policy, even though technically the jamf agent is healthy. This has been rare, and ultimately will sort itself out by the next time Fleet re-runs the policy.
Future Improvements
Parse /var/log/jamf.log for explicit errors
When I developed this process, it wasn’t clear to me that there was a common root cause across our broken jamf agents. After observing for the last couple months, I’ve seen Device Signature Error - A valid device signature is required to perform the action. this consistently, so in a future revision, it might make sense for us to take this approach. This should be more reliable and address the race condition described above.
Using Fleet’s policy automations, we could automatically deploy this script locally, and accept the risk of an exposed API credentials. If we scope the permissions of the credentials to a very limited set, the risk is pretty low.
As an alternative, we could leverage Fleet’s policy automations to instead fire a webhook, which could trigger a cloud function to run the self-heal script instead. Doing things this way would help us keep the API token from being exposed on endpoints.
Conclusion
This approach has been working well for us as a lightweight safety net around Jamf’s self-awareness gap. It’s simple, low-risk, and integrates seamlessly with our existing observability in Fleet.
18 Apr 2025
Like most people, I’m particular about what’s on my desk, and all of my various tweaks, macros, etc. that I use to make my time working comfortable and productive.
I prefer a pretty spartan setup: a mouse, a keyboard, my computers, and that’s about it. Even then, most things are minimal and out of the way. In this vein, my keyboard of choice for this desk is the Apple Magic Keyboard.

This keyboard is great for my purposes, although I can understand why it might not be others’ cup of tea. However, one minor gripe I have is that there is no right control key on the keyboard. This is pretty annoying, because since I mouse with my left hand, I typically rely heavily on the right-side control key for switching desktops in macOS. And given that I never use the right option key, it makes a great candidate for mapping to the right control button.
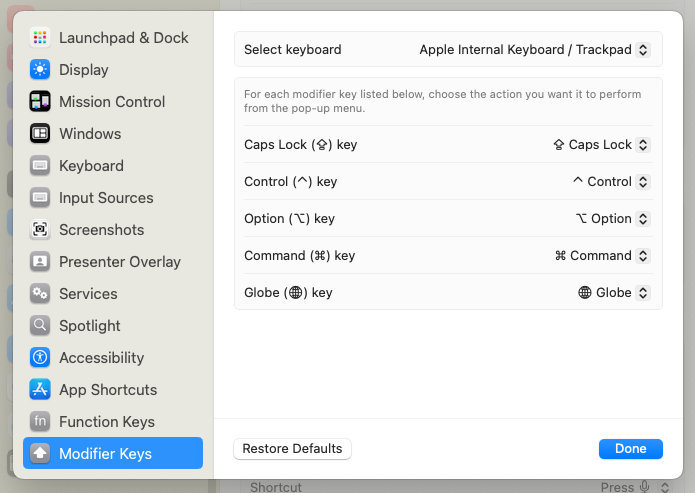
Sadly, Apple does provide a means of mapping modifier keys, but they aren’t specific to individual keys, meaning I can only map both option keys, or none.
For things like this in the past, I used Karabiner-Elements, which always worked well, but was definitely way overkill for my needs. This time, I wanted something a little simpler, and something that I’d be able to run across my work computer without requiring a new Santa (binary authorization) allowlist rule or a system extension.
Fortunately, Apple provides an option that fits the bill. From a technical note written in 2017:
This Technical Note is for developers of key remapping software so that they can update their software to support macOS Sierra 10.12. We present 2 solutions for implementing key remapping functionality for macOS 10.12 in this Technical Note.
In that technical note, the two methods they describe are:
- Scripting Key Remapping: Using the
hidutil command-line tool
- Programmatic Key Remapping: Using IOKit HID APIs
The first method will work perfectly for my use case. According to the Key Table Usages at the bottom, I would need to map the Usage ID of 0xE6 to 0xE0.
Using the example hidutil command provided, that looks something like this:
hidutil property --set '{"UserKeyMapping":[{"HIDKeyboardModifierMappingSrc":0x7000000E6,"HIDKeyboardModifierMappingDst":0x7000000E0}]}'
After running that in my terminal, I was able to confirm this would work.
However, this change will be lost upon reboot. To make this change persistent across reboots, I opted to use a LaunchAgent, which will issue the hidutil command upon each login.
To do this, I created ~/Library/LaunchAgents/com.sbenson.remapkeys.plist with the following content:
<?xml version="1.0" encoding="UTF-8"?>
<!DOCTYPE plist PUBLIC "-//Apple//DTD PLIST 1.0//EN"
                       "http://www.apple.com/DTDs/PropertyList-1.0.dtd">
<!-- See https://developer.apple.com/library/archive/technotes/tn2450/_index.html for more on HID key remapping -->

<plist version="1.0">
<dict>
    <key>Label</key>
    <string>com.sbenson.remapkeys</string>

    <key>ProgramArguments</key>
    <array>
        <string>/usr/bin/hidutil</string>
        <string>property</string>
        <string>--set</string>
        <string>{"UserKeyMapping":[{"HIDKeyboardModifierMappingSrc":0x7000000E6,"HIDKeyboardModifierMappingDst":0x7000000E0}]}</string>
    </array>

    <key>RunAtLoad</key>
    <true/>

    <key>StandardOutPath</key>
    <string>/tmp/remapkeys.out.log</string>

    <key>StandardErrorPath</key>
    <string>/tmp/remapkeys.err.log</string>
</dict>
</plist>
All I did next was reboot and confirm that my changes remained upon login.
Let me know if there’s a better way!
18 Apr 2025
This blog is WIP
I’ll maintain a write up of random things I come across at work, relating to security, macOS and iOS administration, etc. Come back soon.